Early Television  
Mechanical TV History How it Works Mechanical Sets at the Museum Gallery Database Summary Broadcasting Technical Inforation Restoration Advertising Articles Roger DuPouy's Site Peter Yanczer's Site Gerolf Poetschke's Site Eckhard Etzold's Site
Early Electronic Television History American Sets at the Museum British Sets at the Museum Gallery Database Summary Broadcasting CRTs Accessories Technical Information Restoration Advertising Articles Gerolf Poetschke's Site Eckhard Etzold's Site
Postwar American TV History American Sets at the Museum British/Europen TV History British/Europen Sets at the Museum TV in the Rest of the World Gallery of Unusual Sets Broadcasting CRTs Accessories Technical Information Restoration Advertising Articles Eckhard Etzold's Site
Early Color TV History Sets at the Museum Gallery Database Summary Broadcasting CRTs Accessories Technical Information Restoration Advertising Articles Pete Deksnis's Site Ed Reitan's Color Television History Eckhard Etzold's Site
The Early Television Foundation About the Museum Directions to the Museum Articles about the Museum Support the Museum Join our Email List Our Newsletter - "What's New in Old TVs" Equipment Donations Museum Members and Supporters Members Only Monthly Online Meetings Annual Convention Swapmeets
What's New on the Site Classifieds Parts for Sale Resources North American Radio and TV Museums Search the Site
Contact Us Facebook YouTube Channel

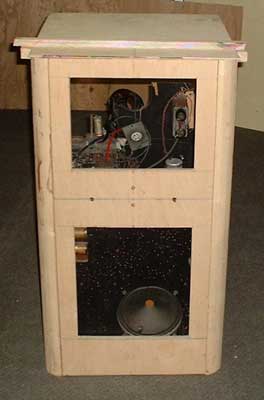
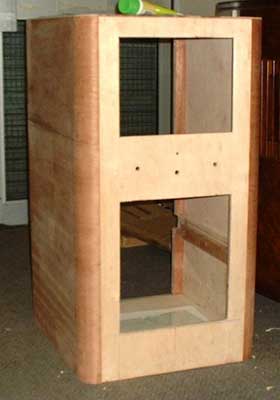
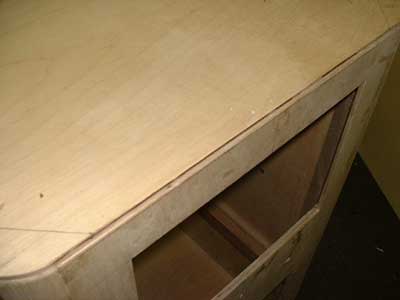
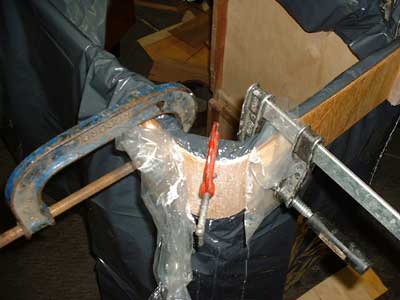
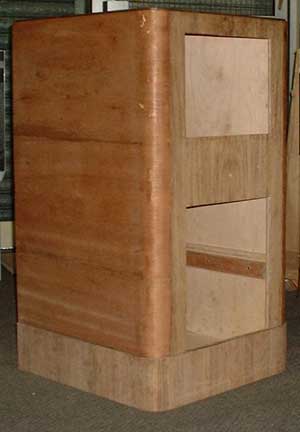
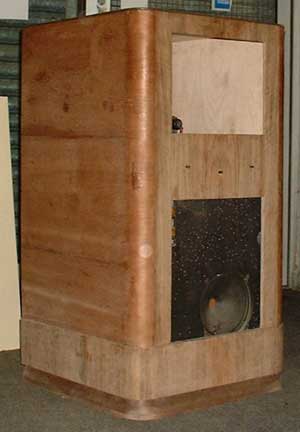
Early Electronic Television

GEC BT 9121 Restoration

David Boynes is in the process of restoring this set in England. As you can see, the cabinet is in terrible condition. David points out that with the total number of early electronic electronic sets in existence less than 400, even the most badly damaged ones should be restored. This is especially true of sets like the BT-9121, with only one or two still around. 

We will document David's progress here.

Early Television

The cabinet before restoration


Early Television

The rear wooden parts of the cabinet have been made and are ready to be clamped and glued together. The next stage will be the front section.

Early Television

This picture of the GEC BT9121 cabinet reconstruction shows the front panel and the radius corner pieces assembled together prior to glueing and clamping. Notice the woodworm holes in the loudspeaker baffle, another job to attend to later.


Early Television

I've glued the front and sides of the cabinet together, but not the top panel, that part can be removed to gain access to the inside of the cabinet in order to fit various items later. This week I will make the skirting which extends around the lower sides and front of the cabinet. It is a styling feature which can be seen on the first picture of the cabinet, it's below the loudspeaker aperture. The picture shows one of the chassis supports.

Early Television

The cabinet sides have been veneered and the next stage is to find some figured walnut veneers for the front panel and the cabinet top. The sides wood grain orientation is horizontal and extends around the rounded corners.

A five inch high 3/16" thick skirting extends around the bottom front and sides of the cabinet, another job to do after front of the cabinet is finished.

Early Television

The upper front and side edges have a stepped feature which was often found on pre-war radio cabinets.

The cabinet is very strong, it has to be as the chassis weighs I'd guess something like 80 pounds.

Early Television

I've found the correct plywood to make the skirting around the lower part of the cabinet. I decided the method to bend the plywood around the rounded front edges of the cabinet would to to pre-form them before fixing the skirt in place.  The best template is the cabinet itself and as the top has not been glued in so far the upper part would be ideal to perform the task.  The plywood was made pliable by immersing it in hot water, nevertheless, it took a number of attempts until a perfect bend was made.  I've applied PVA adhesive to fix the bend.

Early Television

The plywood bending exercise has proved to be a success.  The cabinet skirt has been pinned and glued in place and is ready to veneered.  I've selected the veneers for the job.


Early Television

I've completed the cabinet skirting. The next stage is the construction of the plinth.

Early Television

The cabinet plinth has been fitted, now the cabinet looks more complete.  A few jobs are must be done before the lacquer is applied.   Veneer trim will be applied to the loudspeaker and CRT aperture edges. A thin plywood backing piece is required for the loudspeaker cloth, also, various brackets will be fitted to the rear cabinet battens for the back cover and the mains connector plugs.


Early Television Museum
5396 Franklin St., Hilliard, OH 43026
(614) 771-0510
info@earlytelevision.org